I face a problem each time I have to make a final crosscut on a long board, typical of a bed rail being over 80″ long. I don’t feel it is accurate enough (nor safe) to focus pressure downward as I push the material through the blade with a miter gauge. There is still a chance of the board lifting or twisting leading to an inaccurate cut. My first thought was to make a fence extension for the miter gauge. This just ended up making the cut more difficult as I had to clamp the board to the fence making the piece even heavier at the end. I decided support was needed somewhere toward the far end of the board. I didn’t want to make another catch-all table surface so I made an outrigger. I could have purchased a roller stand and set it parallel to the table but they are not long enough and I wanted to save some money and use up scrap material. Thus started the 1 day build (really 2 parts of 2 days but it can easily be done in one afternoon).
The first step was to cut all the parts. Below you will find a spreadsheet with the names and dimensions of all the parts needed to make the outrigger. I made the parts list of the items I used but you can use what every you want if you would like to make yours look better.

Now for a step by step process on assembly of the outrigger. I assume that if you are making this you have some experience with the table saw, router, drill press, and their accessories.
- Start with the bases by cutting an angle on the sides 2 inches up from the bottom and leaving 2″ of flat edge on the top middle.
- Predrill and countersink holes on a center line of the bases to attach the legs.
- Attach the legs using 1-1/4″ long #8 screws.
- Set the stretcher in place on top of the base pieces and predrill and countersink from the outside of the legs into the stretcher. Use 1-1/4″ long #8 screws to attach the stretcher to the legs.
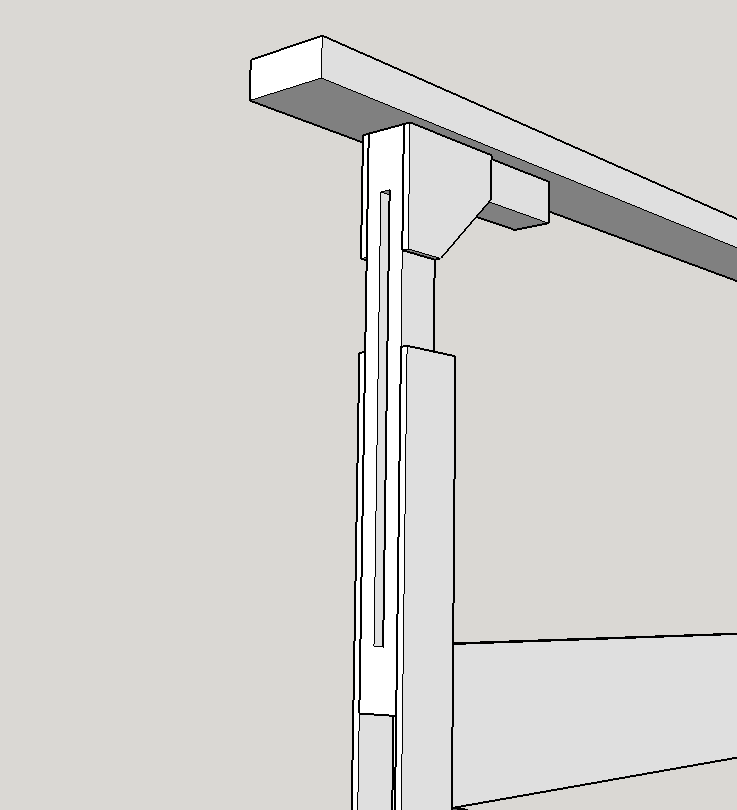
- Route a 3/8″ slot through the center of the adjustable uprights leaving about 2″ of material at each end. Do this incrementally at the router table. I started by drilling the start and stop holes at the drill press as a guide.
- Attach the adjustable uprights to the legs with the 5/16″ bolts, washers, and knobs. I would use star knobs over the 3-point knobs I used in the video. You can get more clamping force with star knobs but it really isn’t necessary unless you plan to use this as a work holding saw horse (if you make 2).
- Add some glue to the sides of the legs and place the plywood channel guides flush with the insides of the legs and against the plywood bases. 5/8″ brad nails are all that is needed to fix them in place.
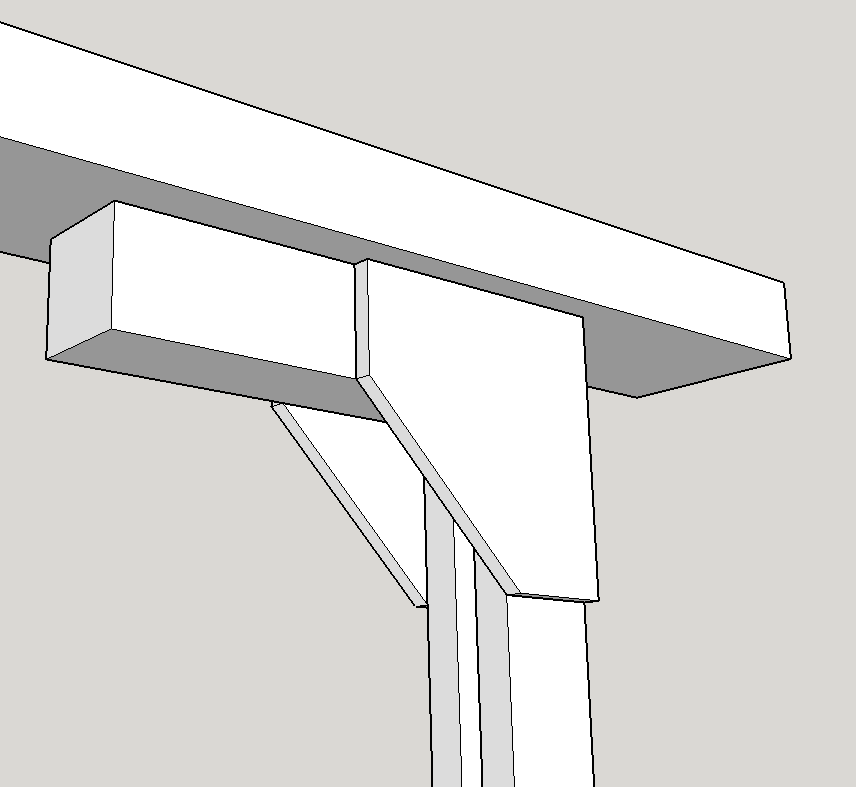
- Attach the gussets to the adjustable uprights by predrilling and countersinking 3/4″ long #8 screws.
- Attach the rail supports at the top of the uprights between the gussets and using a screw on each gusset, again predrilled and countersunk.
- Predrill and countersink 2 holes from the underside of the rail supports to attach the rail. I used 2″ long self-tapping screws here because I had thicker material to screw through.
- After attaching the rail to the supports, remove the rail and rip a bevel on the top side of the rail. Set the table saw blade to about 5 degrees, rip one face, flip the board end-for-end (keeping the reference side against the fence), and rip the other face. If you have a bead in the middle remaining just raise the blade a bit more and repeat this step.
- Reattach the rail, sand the surface (optional), apply a finish (I used shellac because it dries fast), and rub on some wax.
- Set the height so the work piece is flat on the table saw and in contact with the outrigger throughout the cutting movement.
- Done.
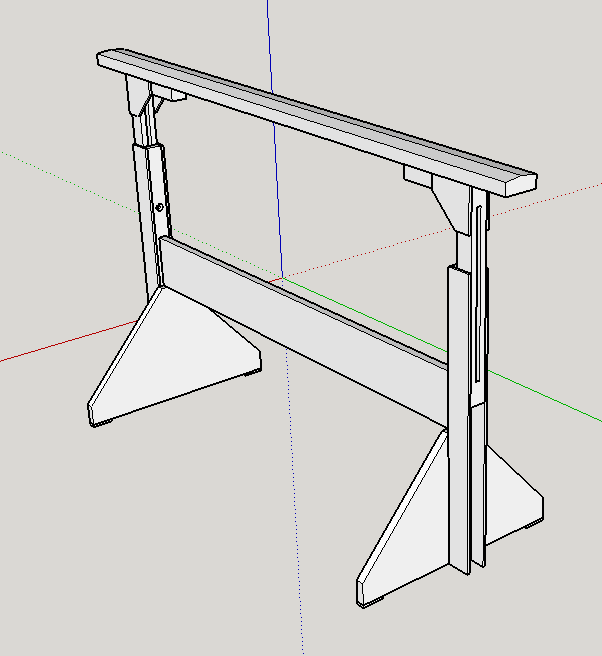
Here are some shots from my model.