
Nine years. That’s how much time has passed since I purchased the dust collector from Harbor Freight. I started woodworking just a few months before and quickly realized I needed some way to control the dust my table saw was creating. After a few weeks of watching Marc Spagnuolo’s and other YouTube Maker videos I found that a cyclone type collector was far out of my price range at that time. The Harbor Freight 2 HP Dust Collector, however, had decent reviews on the various woodworking forums and was within my budget especially with a coupon or when on sale. I believe I picked it up for $190 plus a few extra dollars for new 20 amp circuit, wire, outlets, flex hose, fittings, bolts, washers, and nuts (some the hardware was absent from the dust collector’s packaging). I set up the collector, attached the fittings and hose, and started it up. If you’re new to woodworking and have only run your dust collection with a vacuum (Craftsman, Ridgid, ShopVac, etc.) you will be as pleasantly surprised, as I was, at how much less noise the collector makes in comparison. Not only was the collector now doing a decent job at pulling the dust from the table saw but I could also have a conversation with it running. I slowly started to add more lines starting with a floor sweep, and then a line for a planer. This is when I noticed how fast the bag filled up and how emptying the bag was a very, VERY, dusty job. Not a good situation to be in without a respirator.
Months passed and my insatiable curiosity for woodworking, i.e. buying tools, needed exercising. I now found that the stock filter bag for these single stage collectors sucked, and not in the intended good way. The size and amount of the dust particles being forced into the air was tremendous. I’m going to call it WOG, fog created by wood dust. Now, much like the mouse who was given a cookie, I NEEDED a new filter to clear the wog. Enter Wynn Environmental. Wynn offered a high quality filter for all sorts of single stage collectors that boasted up to 99.999% filtration of particles down to 0.5 microns. What does that even mean?! Essentially, it means these pleated filters will trap nearly all particles the size of bacteria out of the air. Perfect, I had to have it. I NEEDED it. But there was a price tag for the filter higher than the cost of the collector alone. Who in the right mind would add aftermarket products that cost more than the tool itself? What I should say is who has two thumbs (currently) and would buy a aftermarket products that cost more than the tool itself? This guy…and all the other hobby woodworkers with entry level single stage collectors. BUT it didn’t happen. I just coped with the continuous reduction in suction, the nasty bag changes, and filter cleanings.
Smash cut nearly a decade later and here I am. Not only adding the expensive addition of the Wynn Environmental MERV 15 filter canister but also upgrading the blower fan, adding a Grizzly Growler Cyclone, remote control switch, and installing metal duct work. In case you are wondering “how much did this crazy guy put into a cheap single stage dust collector?” Here’s my answer: more than a new Grizzly cyclone collector costs, about $1,200 total. I’ll try to itemize the cost so you can see what to expect if you do as I did.
*Here’s the outline of what I am using to “Super Charge” my Harbor Freight 2 HP Dust Collector (some material were already on hand):
Harbor Freight 2 HP Dust Collector – $220
Rikon DC Blower Fan – $126.23
Grizzly Growler Cyclone – $317.21 (on sale)
Wynn Environmental Pleated Canister Filter – $270.18
Duct Work – $150 (varies depending on the length of your system)
DC Couplings and Blast Gates – $35
6″ Collar – $14.60
Riveting Tool – $26
Remote Control Switch – $16
*My situation is most likely different than yours being I had a lot of dust collection fittings on hand, plywood, 2×4 material, screws, primer, and paint. I am not counting those costs in this itemization. Linked items are affiliate links to support my addiction.
To start this modification, I removed the fan cover from the DC housing, and replaced the blower fan with the Rikon Blower Fan, part P20-600-22. This is as simple as removing the left hand threaded screw and washer, pulling the fan off the shaft (don’t lose the key), pressing on the new fan (use a block and deadblow hammer to fully seat it), and replacing the screw and washer. You will notice the fan blades are curved in the opposite direction than the stock fan blades. I’m no scientist (and this article shows no quantitative data on performance) so I don’t have any experience of explanation for how or why it works better but believe me it does.
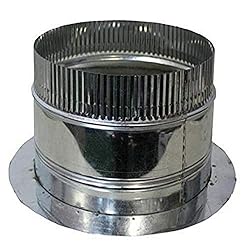
While you have the cover off this is the time to cut off the 5″ port and replace it with a 6″ or larger collar. I chose 6″ because it is easy to get 6″ duct work. I used this collar.
This collar had some pleasant surprises. It came with 4 pre-drilled holes and an adhesive backed insulation gasket. Nice feature. I anticipated using some silicone sealer but the insulation worked perfectly.
I marked a 6″ hole using a washer with a 1/2 rim by placing it flat on the cover and up against the 5″ port. Using a sharpie marker on the inside of the washer hole I roll the washer around the port to mark out a perfectly centered 6″ ring to use as a guide to cut the larger opening. You could go a little bigger than the 6″ diameter as the collar has a nice flange to cover a larger opening. There are a variety of ways to remove the 5″ port but I drilled a hole and used a metal jig saw blade to cut it out. I had to cut from the back side as the collar was too close to the cut line to cut from the front.
To attach the collar I cleaned the surface with precious denatured alcohol (I live in CA and it is banned for sale in stores), placed the collar on center as best as I could, drilled 4 more holes, and riveted it in place. Be sure to set the rivets so the washer side is on the inside of the cover. Now reinstall the cover and paint it (or not) as you like. I’m a little bit self-proclaimed non-clinically diagnosed OCD and the green from the Harbor Freight motor doesn’t match the Grizzly green cyclone so I painted black everything that was not Grizzly green or already black.
While you are painting you can paint the ring that holds the new filter canister and bag to match the blower housing. If you are still waiting on the canister filter you can build the mount for the canister rim and paint it too. I watched DIY Tyler’s video on his build several times to see how he mounted his motor and filter rim. When I had both mounts constructed I painted them and attached both units to the wall starting with the motor and fan. I gave the motor about 6 inches of clearance from the ceiling but I could have got away with 3″ I’m sure. Just keep in mind the closer to the ceiling the motor is the tighter fit the filter rim mount will be to fasten to the wall. Life is difficult as it is don’t make it any harder.


With the motor and rim mounted, aligned, and connected with the 5″ hose that came with the HF DC (cut it to length) you can make a pair of rings to attach the filter to the rim. Again, watch Tyler’s video to see what he did. It’s hard to explain without seeing this. I’ll say one thing I did differently was I used foam weather seal strips between the rim and the cap and rings.


This made it so I didn’t have to put a nasty bead of caulk around the rim. You know what they say, Cleanliness is next to happy wifeiness… or something like that. After you’ve spent 68 minutes watching various YouTube videos on this modification you can mount the filter in place via the instructions sent with the Wynn filter. I kept the bag retention strap to hold the poly bag to the bottom of the filter but I had to cut it a little shorter, drill out the rivets on the sharp toothy end, and rivet it back on the shortened strap. After doing that you may spend a few more minutes looking around for things you can rivet together, it’s a cool new tool, I get it. Stay on target and hang your filter’s poly bag.
The Grizzly Growler Cyclone Separator G0863 is short and has a 7″ port to connect to the blower fan 6″ collar. You’ll need a 7 to 6 reducer which can be had at your local hardware store. Put that on your cyclone (paint it first if you like, I didn’t and I’ll regret it) and tape it with foil tape. Now you can get a measurement on how high you need to mount the cyclone and drum. I kept the casters off on my drum and made a “floating” platform with a board and a pair of shims so I could pull a shim to lower the drum for easy removal when full. Again, Tyler did something similar.


The cyclone and barrel’s shared vacuum hose can be tricky to get it all lined up. If you use the poly disposal bag you will need that vacuum hose to keep the bag down in the drum. I will probably not use a bag at some point so I’ll remove the hose and tape the ports off. I’ve seen someone completely remove the cyclone’s pipe and tape off the holes.
With the cyclone and filter all hung, sealed, and taped you can start on the duct work. The intake port to the cyclone is 6″ that’s why I chose 6″ duct work. I put on a pair of adjustable elbows to raise the duct work just under my garage door track and fixed the ducts to it using galvanized steel hanger straps.


I taped each joint with foil tape and used two 6″ wyes to make two short runs off the main line to connect to the planer and combination drop of the jointer, table saw, and band saw. Coincidentally the cyclone comes with a 6″ dual port so you can connect that directly to a wye and add your blast gates for two adjacent tools.

Add 6″ to 4″ reducers on the other parts of the wyes to attach your blast gates. You’ll probably need 4″ couplings on each 4″ reducer to attach the gates, though some gates have enough of a taper to fit in the reducer. Tape them on really well. Use 4″ flex hose to attach to your tool’s dust port. I like to use keyed hose clamps. Use a 6″ cap to finish off any wye at the end of the run unless you used an adjustable elbow at the end. I like to put a wye there for any addition at a later date.
This pretty much the end of the line for this upgrade. You will notice a huge increase in suction at the tools you are using. I’m beyond thrilled to be able to take on this upgrade despite the cost of entry. If you are a hobbyist and have a limited budget this is something you can do a little bit at a time. Start with just the filter canister to replace the bag. No modification just a simple replacement. That alone increases the suction. Then maybe consider the fan blower followed by the cyclone. I can’t stress how important rigid duct work is to maintain air flow. Using long runs of flex hose creates a lot of drag and reduces air flow (again I’m not basing this on scientific data just my own experience).
*At this time I have changed the branch for the jointer, table saw, and band saw to have a single 3-way junction fitting from Rockler. This just worked out better than having 2 wyes on a drop.
