In search for a wax polish that could be used for more than just wood finishing I came across a Beeswax/Oil Polish that can be homemade. It is used on bare wood to penetrate the grain and smooth out the surface and keeps the surface to a matte, or satin, shine. It can also be used on canvas for water proofing and leather for polishing and waterproofing as well. I’ll show you how to make two of your own homemade mixtures to serve a few purposes: wood finishing, canvas waterproofing, and wood polishing. The only difference is the addition of oil.
First you need beeswax. It can be organic or not but it has to be 100% beeswax, no additives. You can purchase beeswax through my Amazon Affiliate link on the home page or click here.
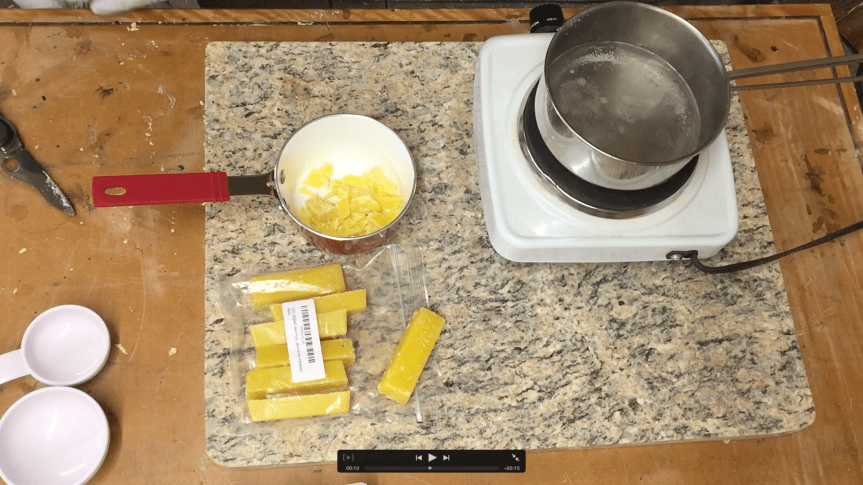
Next you will need some sort of wood finishing oil, such as Boiled Linseed Oil or Tung Oil, just as long as it is 100% oil and it is a drying oil. Mineral oil is not a drying oil and “oil finish”, such as Danish Oil, has varnish in it which you do not want for this application. This is optional depending on the type of beeswax mixture you are wanting to make.
Finally you will need some sort of thinner. You could use paint thinner, mineral spirits, turpentine, naptha, MEK (methel ethel ketone), etc. As long as it will thin oil finishes/paints. If you unfortunately live in California, as I do, you will no longer be able to find normal mineral spirits. The “Green” no VOC Odorless Mineral Spirits is no good for this puropse. I chose to use Turpentine, it smells good, and reminds me of an artist studio as it used to thin oil paints.

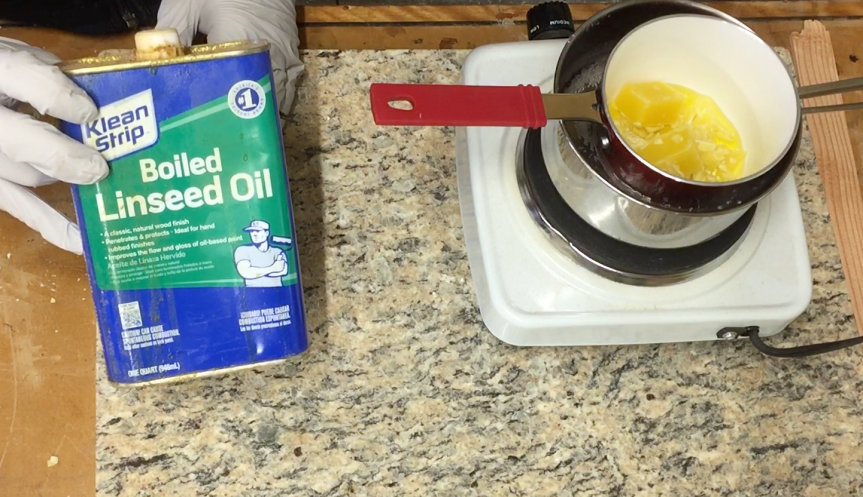
Now for the mixing. On an electric burner (a flame will ignite this mixture), place a pot of water on to boil and use glass or stainless steel bowl on top to warm up. This is called a double boiler, it is used to slowly melt the wax. Then put in the beeswax. Chop it up in small pieces to speed up the melting time. The amount to use will be a 2:1:1 ratio of wax to oil to thinner. That means for every 2 parts wax add 1 part of oil and 1 part of thinner.

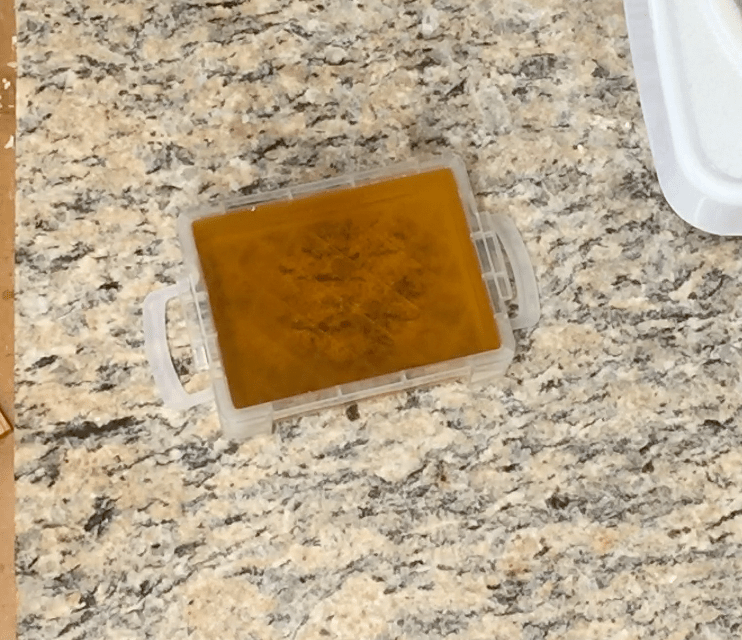
Example: I used 1/2 cup of melted beeswax and added 1/4 cup oil and 1/4 cup turpentine. In the end the amount of wax to liquid (oil and thinner mix) were equal. With the wax melted, remove the bowl from the heat, and slowly add the thinner while stirring gently. The thinner will blend making yellow ribbons as the thinner cools the wax until the thinner is warmed and the mixture is clear again. Then add the oil while stirring gently until completely mixed. Now pour the mixture into a storage container, let it cool, and mark it as “beeswax finish.”

Use it on wood for a light oil finish and a satin shine or use it on canvas for waterproofing. More on that later.
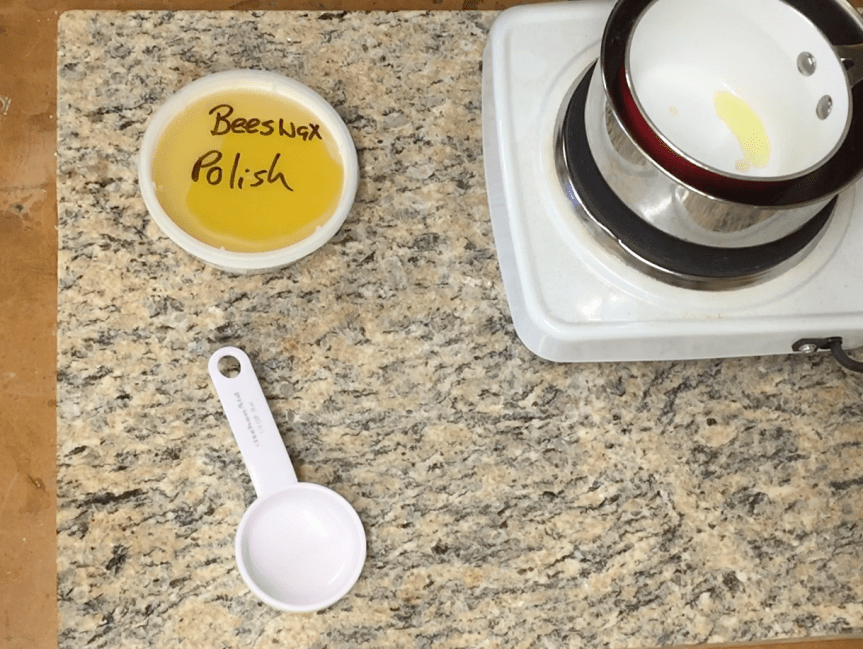
Now for the beeswax polish. It is exactly the same as above with the omission of the oil. The ratio is 1:1 wax to thinner, depending on how smooth you want the polish to be. Use less thinner for a thicker polish if you desire. Melt and mix the wax with the thinner in the same manner as above. Pour the mixture into a storage container and mark it as “beeswax polish.”
To use these mixtures, simply rub them onto the surface using a small circular motion, think “wax on, wax off.” If you are using it to finish/waterproof something you will want to get a clean cloth and a heat gun, a hair drier may work but a heat gun gets hotter and your wife won’t ask questions. Then heat the wax oil until it melts into the surface and rub it in once more. The surface should be smooth as a, well, you know. The polish is simply rubbed in and buffed off.

This is a simple way to create a nice finish in your shop for multiple uses but it does not offer the surface protection from scratches as a polyurethane or a built up finish will.

Good one! Homemade waterproof wax.
Yeah I have been meaning to make a video along with this article showing how to waterproof a canvas apron but other projects are taking precedence.
There is a picture of you pouring the finish, or maybe it’s the polish, through a coffee filter. But no mention of it in the article that I saw. Do you have to filter it?
It’s a fine filter used to filter material that goes into a spray gun. I filter everything before I use it. It gives me peace of mind that no clumps of solid material will make its way into the finish.
Nice one, do you reckon it’d be good for waterproofing an outside deck made from reclaimed scaffolding boards?
I wouldn’t use it on decking. It just too much material to make. There are commercial products that you can get for that.