I enjoy making benches and playing with mixed materials from time to time. When the opportunity came up to make something using one bag of cement I had an idea. Incorporate a traditional woodworking joint into cement and make a modern bench at the same time. Thus the design of a cement formed dovetail leg and a single board bench seat.
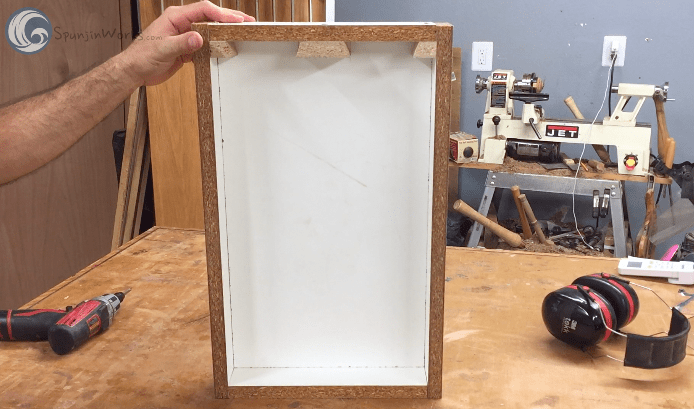
For this project I used exactly one 80lb bag of Quikrete 5000 cement. The form I made measures 10.5″ x 18″x 1.5″. It was constructed of melamine and screwed together. Making forms is a simple process, you just need your design in mind and remember that the form is an outline of the end result. Also remember you will need to remove the form easily when the cement cures. If you are making holes inside the form use plastic that can be cut away or pulled apart for easy removal.
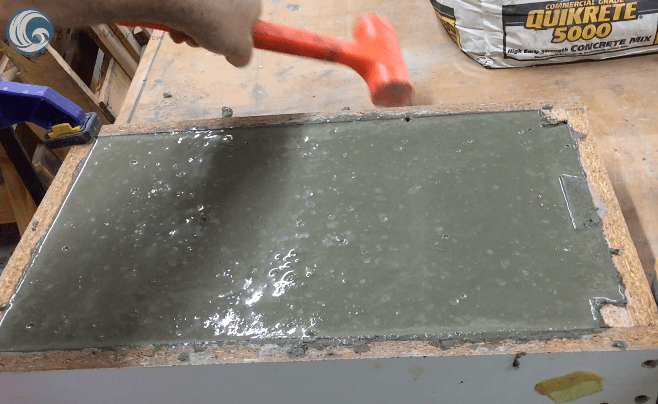
I mixed the cement in a bucket with a grout mixer in a drill. This made mixing very fast and easy. The cement was then poured into the form and vibrated to relieve the bubbles from the bottom and sides. Note that it helps to have the form vibrating as the cement is being poured to ensure the air bubbles come off the surfaces quickly. Also keep in mind to use some sort of reinforcement for the structural integrity of the cement. I used mason ladder wire in the middle of the form. Pour half the cement, place the ladder wire, and pour the rest.

When the cement is all in the form you will need to vibrate/tap on the form for 60 minutes, no less. Otherwise you will have holes in the surfaces. Allow the cement to cure per the instructions from the manufacturer.
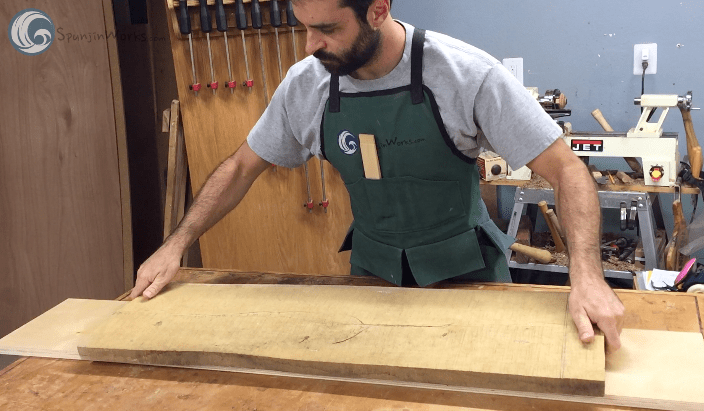
With the cement curing for a few days I worked on milling the wood bench. I used a custom milled and air dried white oak board that was 11″ wide. I cut it to 36″ long and milled it to thickness. I would have liked it to be 1″ thick but the warping in the board brought it to 3/4″ after milling. Any knots were filled and stabilized with tinted epoxy and the final milling was completed.
Once the cement was cured I removed it from the form and cleaned it up with some sand paper to tidy the edges. I placed the form upside down on the ends of the wood seat and traced out the pin locations. Use your preferred method for cutting dovetails here. I like using my hand saw and chisels but you can use a bandsaw as well.


Clean up the ends of the board and apply the finish of your choosing. I went with a few coats of oil varnish.

It is time to push the seat into the dovetails to set the with of the legs. I wanted to add steel rope to hold the legs together and I found these Hammock Hangers looked great for this purpose. I positioned the hangers in the middle of the legs, pre-drilled a 3/16″ hole for the 1/4″ TapCon screws, the steel rope was cut to length, the loops were made with the hoops inside (this has to be done at the same time), and I drove the TapCons in place to anchor the hangers.


To tighten the steel rope I used a turnbuckle similar to those used for gate supports. Just turn the turnbuckle until the steel rope is stretched and the legs aren’t pulled in too much, do not over tighten. The seat will tell you when to stop. You can also hold a square to the seat and legs to be a guide.
Now put the bench in a nice location and enjoy. Be sure to move this with a friend. It isn’t rigid enough to pick up alone and the dovetails may be brittle. Treat this bench with care and it should last for a long time.


Here is a list of the products I used with exception of the cement (affiliate links):
Hammock Hangers – http://goo.gl/ttR6Di
3/16″ Masonry Bit – http://goo.gl/IK5P85
1/8″ Steel Rope – http://goo.gl/gpuW5C
Steel Rope Thimbles – http://goo.gl/1gIO2p
Cable Clamps (similar) – http://goo.gl/9eT0QP
Turnbuckle – http://goo.gl/1ZHRw5
Varathane Outdoor Varnish – http://goo.gl/kY5JkV
